Once in a while, your detailing efforts will be disappointed by untidy headlights. You may have already invested a lot to bring out that showroom glamour only for the headlight to appear dull. It is at this point you may start googling things like “how to clean dirty headlights” etc.
If that’s why you are here, worry no more; we got you covered. Initially, hazy headlights were unheard of until the invention of modern LED polycarbonate plastic lenses. These are more economical but the chemicals used in their production react to UV rays, heat and moisture.
It is this reaction that results in the foggy appearance of the headlight. Although, not all hazy problems are due to reaction, sometimes, it’s due to dust and sand accumulated on the road over time. Therefore, with a proper wash, you can get it back on the right appearance.
Other than messing your vehicle’s aesthetic beauty, foggy headlights are dangerous to drive with. In this article, we propose one DIY method that will cost you only a few bucks. Using a WD-40, you can give your headlights that brand new look.
What Makes Your Headlights Yellow/Foggy/Hazy?
There are several major causes of headlights foggy look. These include:
1. Oxidation
Modern headlights are made of materials that react with various environmental elements. Some of the components used include polycarbonate, fiber, halogens. The reaction between these materials and elements such as moisture, UV light and heat, results in oxidation. Since the oxidation process takes part on the front part of the headlight, it makes it yellowish causing the entire part to look foggy.
2. Road debris
Sometimes the fragments and dust accumulating on the headlight can cause foggy. Remember the car isn’t made to stay at one place. So, when moving around, it will collect all manner of fragments that scratch and tear the surface of the headlight. For example, during winter, there is a lot of salt along the roads and so you expect it to settle on the car.
3. Chemicals
All the headlights come with a clean headlight top. The cover’s durability depends on the kind of chemicals you use on it. The stronger the chemicals you use, the less the cover’s lifetime. Products such as WD-40 even though it is a good cleaning substance when excessively used can result in a foggy look. So, if you want to evade the haziness caused by chemicals, avoid too strong brands.
4. Condensation
This is a serious threat to headlight clarity and lifetime. When the bulbs light, they generate heat. To counter this heat and cushion the plastic lenses, manufacturers developed a way to cool the bulb from inside. They created a small opening at the back of the headlight to deliver water inside. Due to the temperature difference between the inside and outside of the headlight, condensation is inevitable. This will definitely cause your headlights to look foggy.
Headlights Cleaner With WD-40 Review
All man-made products have their upsides and downsides. The same applies with WD-40. Theretofore, you need to be aware of the following features, pros and cons as you use it to clean headlights;

Features
- It delivers good results when used on different surfaces. Good examples include tiles, metals, ceramics, wood, aluminum, etc. It leaves a sparkling and shimmering look when used on such surfaces.
- It can be used as a lubricant for farm equipment such as shovels. Even though it’s not a usual lubricant, it does a good job.
- It protects metals against rusting
- It’s a great cleaning agent. You can use WD-40 to clean the toughest stains on various surfaces. In the case of headlights, WD-40 does a good job.
Pros:
- It is readily available
- It is effective in cleaning dry stains on some surfaces
- It is relatively cheap
- It can clean a wide variety of stained surfaces other than headlights
- It is easy to use
Cons:
- WD-40 can only work on certain surfaces
- If applied wrongly, it can lead to permanent damage
- It is not a real lubricant
How To Applying WD-40 To Clean Hazy Headlights?
To clean headlights with WD-40, follow the steps highlighted below;
1. Clean the headlights with water
First things first, before attempting to use WD-40 on the surface of the headlight, you need to ensure it is clean. This is because the particles on the surface can cause more damage. Note that using a simple water hose can give good results.
2. Wipe the headlight with a towel
Once your headlight surface is clean, use a cotton towel to dry it. Besides drying the surface, wiping off helps you remove any stubborn stain that may have remained. If you notice any resistant dirt, you can try using water again to remove it.
3. Scrub the headlights with a Sandpaper
In as much as this step is optional, it is very important if you want to get the best results. You can use any grit but we recommend 600. To see how the sanding spans out, you can start the process from one corner. Proceed to the other end ensuring everything is uniform.
4. Spray the WD-40 on the headlight
Before spraying, you may need to check whether the WD-40 is still active. It has a shelf life of 5 years after which its efficiency drops. So, check whether yours may have expired. If it is okay, go ahead and spray it haphazardly on the headlight surface. Wait for approximately 60 seconds without doing anything.
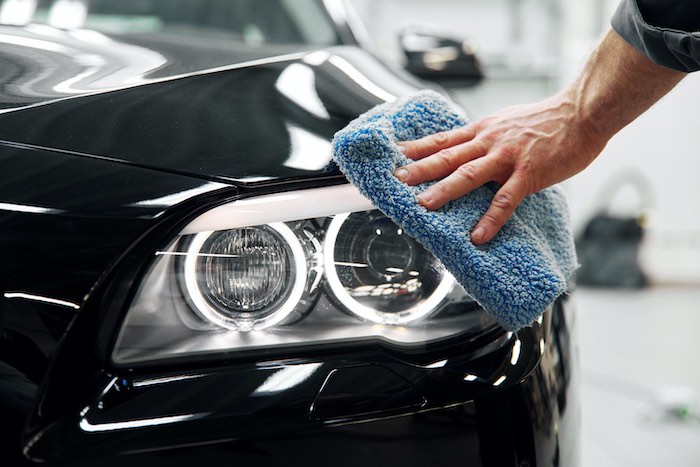
5. Wipe with a clean towel
This is the point that determines how effective the WD-40 will be. So, make sure the towel you use is sparkling clean. Additionally, if you have sensitive skin that may not be comfortable with this product, you can wear gloves.
Now, wipe the headlights repeatedly turning the towel until it appears maximally clean. A microfiber towel is recommended for this purpose. If the headlight isn’t clear with the first wiping, you can repeat this process again and again until you are satisfied. However, you should be careful not to overdo it which can damage it.
Does WD-40 Clean Plastic Headlights?
Yes, through a step-by-step process that involves other tools you can perfectly restore your headlights with a WD-40. We have described this process above starting with washing the headlights with water, wiping, sanding to application.
However, WD-40 should be used cautiously lest you destroy your headlights. When excessively used, it can leak inside the headlight or bulb which can lead to blur or burnout.
To avoid such effects, it’s advisable to wash off the WD-40 using an automotive soap once defogged.
Why is WD-40 Not Good For Headlights?
Durability is the biggest downside of WD-40 as a headlight cleaner. Whereas it brings out the perfect clarity on a hazy headlight, the effects can only last at most two days. After that, you have to defog again. Therefore, instead of acting as a restoration product, WD-40 is more of a polishing tool.
However, when used on other surfaces such as tiles, ceramic, aluminum among others, its effect lasts more. That explains the availability of this product in the market as it is required for various purposes.
Home Remedies To Clean Foggy/Hazy Headlights
WD-40 isn’t the only available substance you can use on your hazy headlights. There other simple substances that are basically very cheap and easy to initiate. Below, we point out the best two of these;
1. Clean Headlights with Toothpaste
If you want to clean your foggy/hazy headlight using a toothpaste, follow the procedure below;
- Gather all the required materials: The required materials here include masking tape, water, car wax, soft cloth and toothpaste. Plastic or vinyl gloves are also necessary for people with sensitive skin.
- Clean with soap and water: Before you start the real process, you need to clean the surface with water and soap. Scrub the surface using a rough piece of cloth and rinse with clean water. After rinsing it, allow it to dry for several minutes.
- Cover the headlight immediate areas: Using the masking tape, cover all the immediate areas to protect them against unwanted scuffing.
- Put on gloves: if your skin is sensitive, wear plastic or vinyl gloves. With gloves on, moisten a piece of cloth and add a good quantity of toothpaste to it.
- Clean the headlights: Using the moistened piece of cloth with toothpaste in it, rub the surface of the headlights in a circular manner. You can add the toothpaste and water every time you feel you need it. Repeat this process for approximately 5 minutes.
- Wash with clean water: Rinse the surface with clean water and let it dry on its own.
- Wax: Ensure that the headlights have dried up completely before waxing. Once sure, polish it with car wax to prevent dust accumulation in the future.
2. Clean Headlights with Vinegar and Baking Soda
If you no longer want to cough a few bucks for professional car defogging, this is another awesome DIY method. Some people prefer using each of these items independently whereas others combine. All of them work well and so it’s upon you to establish which works best for your headlights. Here, we show you how to use both;
- Like with the other steps, the first step should be cleaning the headlights with clean water. This helps to reduce the stains you have to deal with.
- Apply enough quantities of both vinegar and baking powder on the lenses.
- Scrub the surface continuously repeatedly adding the two as need be. Although, you should bear in mind that not all yellowing can be removed through this method.
- Once you are comfortable with the clarity, wax up the surface. Alternatively, you can paint it as you want as the fining touches up.
How to Maintaining Your Car’s Headlights?
Instead of waiting for the foggy problem to appear on your headlights to deal with it, you can prevent this problem from occurring. You can do this by taking the measures below;
1. Parking your car under the shade
Above, we’ve mentioned that moisture and UV light from the sun is among the causes of foggy headlights. That means, parking your car under the shade reduces its contact with such elements. Even though finding parking with a shade always can be a toll order, always go for it when it’s an option. This way, you’ll be lengthening your headlights cover a lifetime.
2. Wash your headlights with automotive soap
Stop always depending on your carwash buddy to clean your headlights with the right soap. Make sure you wash your headlights with an automotive soap at least once after 2-3 months. Besides, you don’t know the kind of soaps used on your car and some of them may damage your headlight cover.
3. Use polish and microfiber when polishing headlights
Polishing your headlights using the appropriate tools will restore your headlights to their original state. It gets rid of all yellowing returning the car’s original looks. There are several complete restoration kits in the market like the 3M. These are equipped with light sanding disks for maximum cleaning.
Recommended Article
The 15 Best Portable Pressure Washer With Water Tank Reviews
Recap
Despite numerous people encouraging the use of WD-40 to clean headlights, users should be very careful. Well, the product gives the best results when used appropriately but its effects cannot be overlooked. Relying so much on WD-40 to defog your headlights can be the worst decision you’ll make for your car. If you feel like you need to fix the headlights yellowing the best way, go for a headlight restoration kit.
However, not all garages you’ll find this service. In that case, you can go for the DIY restoration kits. With these, you can rebrand your headlights to give them that covetous look you’ve always desired. Besides, most of them come with a simple user manual that you can follow even if you have never done this before.